Virtualization
Many times we need to work on different operating systems for the same project. For example, we need to develop a cross-platform application, and we want to test it in different operating systems.
Using virtualization allows us to use only one PC in order to have different operating systems, without the need of rebooting every time.
Some popular virtualization programs are Virtualbox and VMWare. They are powerful tool, but Windows in recent versions has its own virtualization tool, named Hyper-V, so there's no need to install different products in most cases. In recent versions it's also possible to install operating systems different from Windows, allowing us to install Linux, for example.
In this article we'll see how to install Ubuntu on an Hyper-V virtual machine.
Create virtual switch
Hyper-V allows to create virtual switch that allows to connect our virtual machines to the network. In order to connect a virtual machine to internet, it's necessary to create a dedicated switch, and assign it to a specific network adapter on the host.
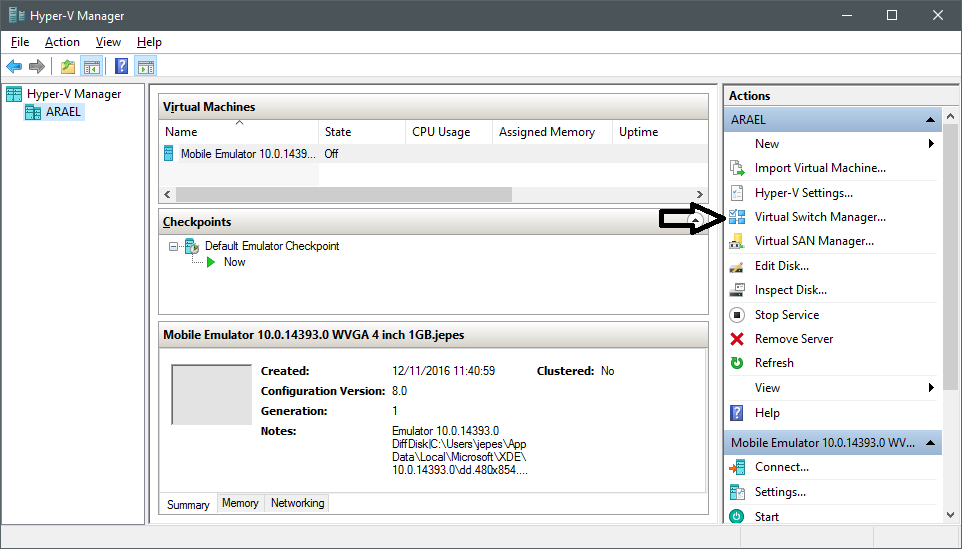
Open the Hyper-V manager and select the Virtual Switch Manager item:
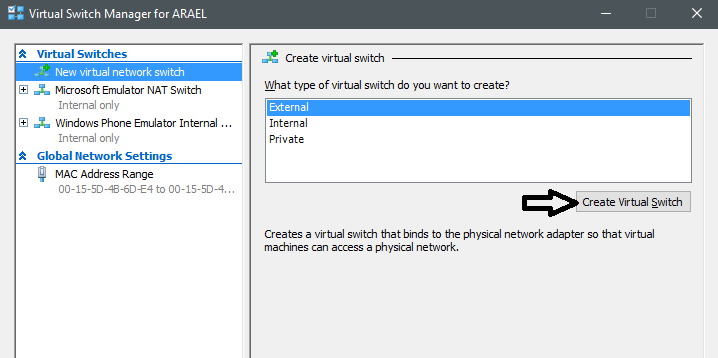
The Virtual Switch Manager window appears. At this point we need to create a new virtual switch, so we must be sure that External option is selected and the press the button Create Virtual Switch.
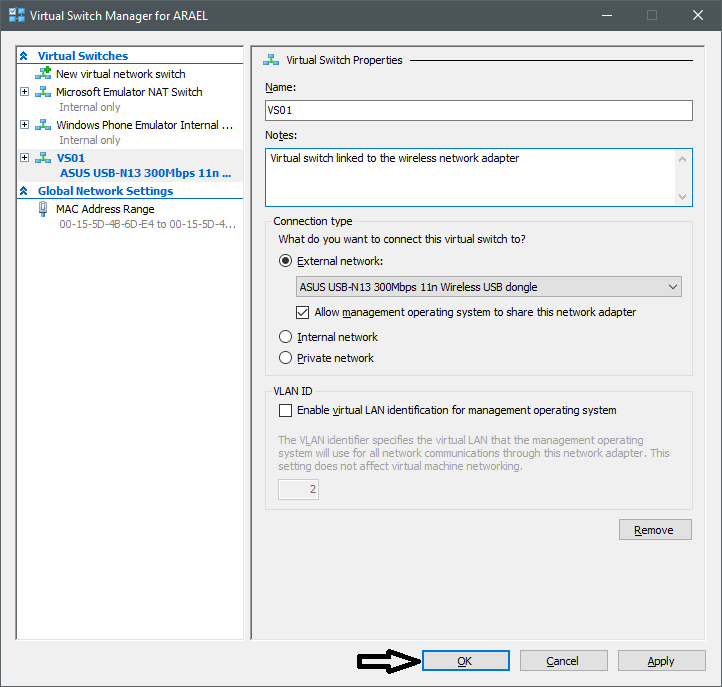
Now we can set some options, like the name of the virtual switch, a brief description, and select the network adapter that we want to connect to the virtual one. At this point press OK and we'll have the new virtual switch.
Windows will notice that connection can be interrupted during the virtual device creation, but it's not a problem, the disconnection will endure for some second. At this point the virtual switch is created successfully.
Note that we don't need to create a new virtual switch for every virtual machine that we will create. Only one will be sufficient.
Create virtual machine
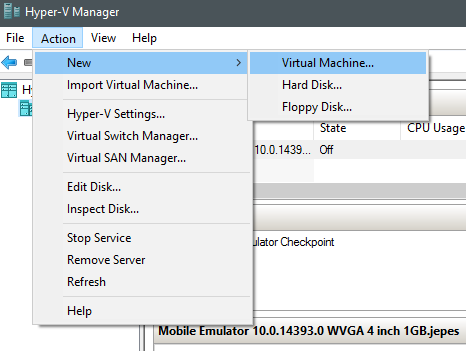
At this point we can create the virtual machine. With your pc selected on the left panel, click on Action → New → Virtual Machine...
A wizard will start, and we must follow some steps in order to create the state machine.
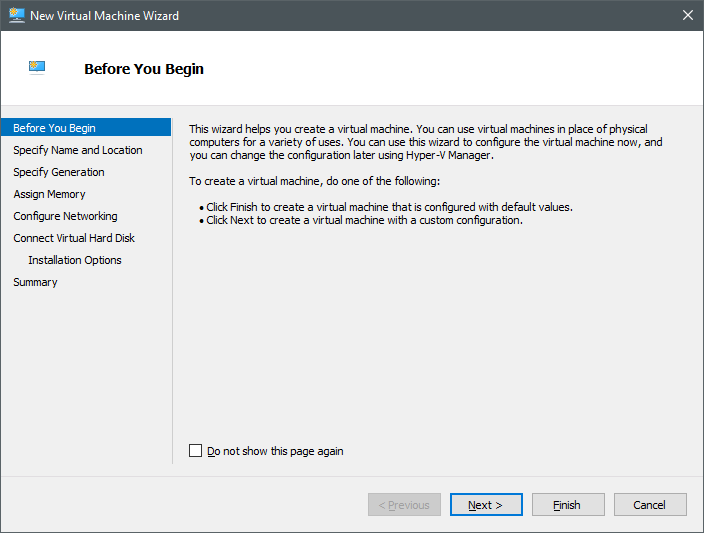
The first dialog is an introduction, we can go directly to next one (you can also click on the checkbox in order to avoid to see it again):
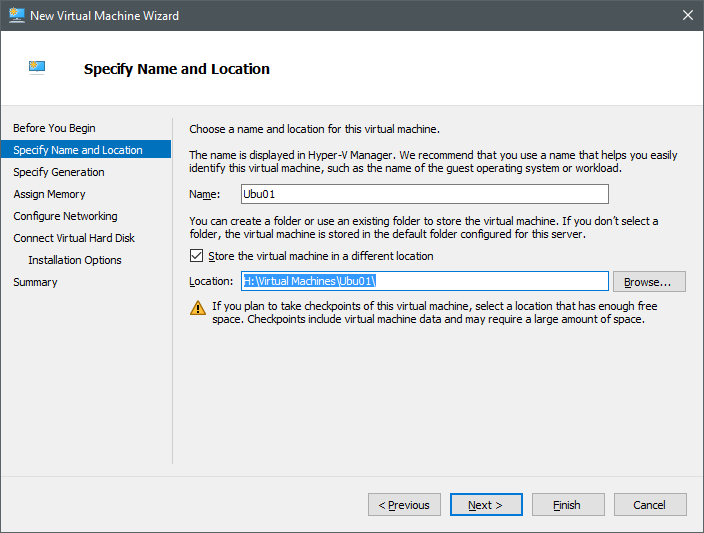
In the next step, we have to set the name of the virtual machine. I often also select a new path for storing it, because I want to put it in a separate, dedicated hard disk. You can maintain the original path or set a new one. Just be sure that you will have enough free space for it:
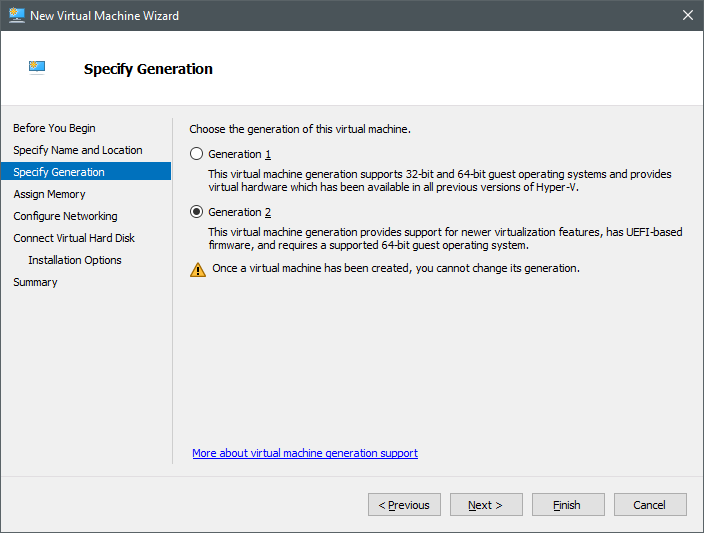
In the next step we need to select the virtual machine generation. There's no reason to don't select the new generation (until you want to export virtual machine for older windows version, or the guest operating system does not support UEFI), so select Generation 2 and go on:
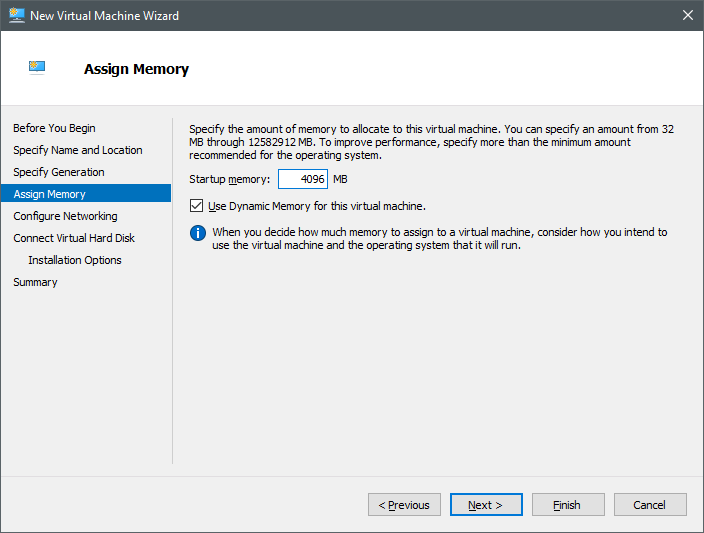
In the next step, we'll set the RAM that must be dedicated to the virtual machine. You should decide it based on available RAM and the operating system that you want to virtualize. A mode desktopoperating system requires usually at least 2 Gigabytes (you can use lower RAM if you want to virtualize a server, but it's always depending on applications that you want to use inside the virtual machine):
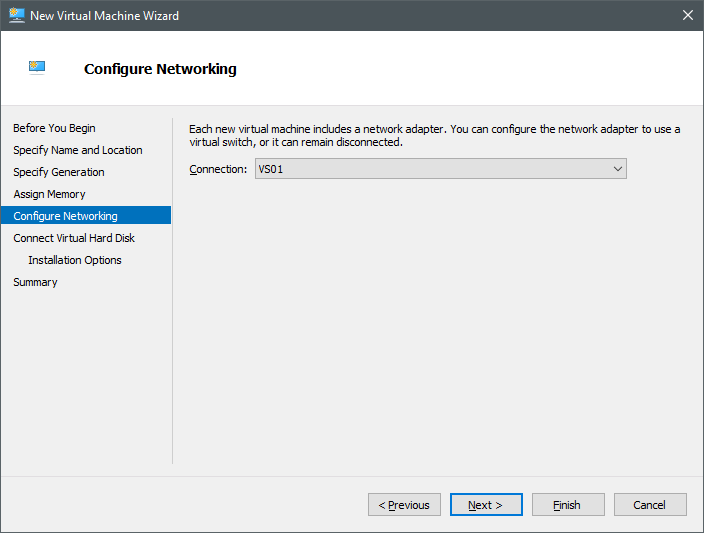
In the next step, we need to select the virtual switch that must be linked as network adapter to the virtual machine. Select the one that we created before (of course, if you don't want to connect the virtual machine to internet, you can select a different virtual switch):
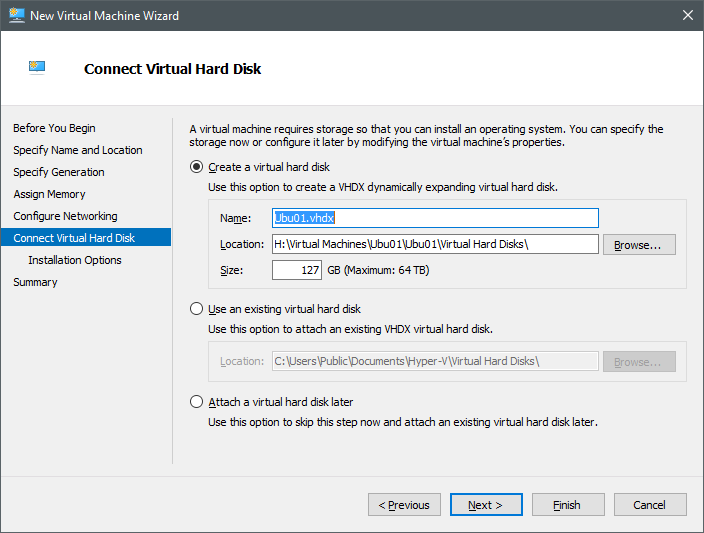
In the next step, we'll set the hard disk for the virtual machine. This is a file representing the hard disk. You can set the dimension that you need. Consider that the virtual hard disk is dynamic, so if you create a 500 Gb hard disk, the file will not occupies all this space from the beginning, but its size will grow with data that will be stored:
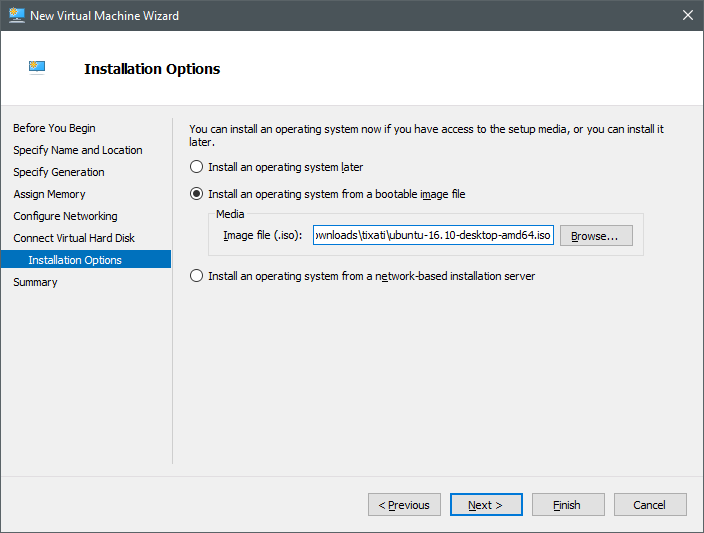
In next step, we can select if to install the operating system now or later. If you already have your Ubuntu iso, you can set it now. Otherwise you'll need to mount the iso later:
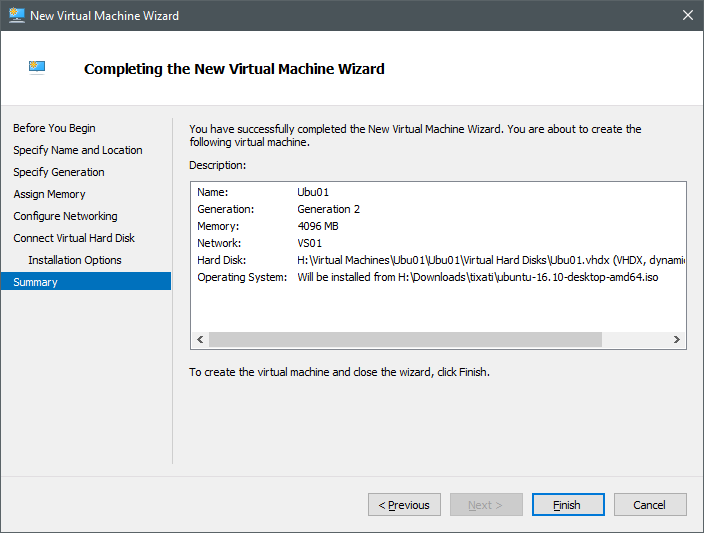
The next step is the last one, and it's simply a summary of what we've done. At this point, we can click on Finish button.
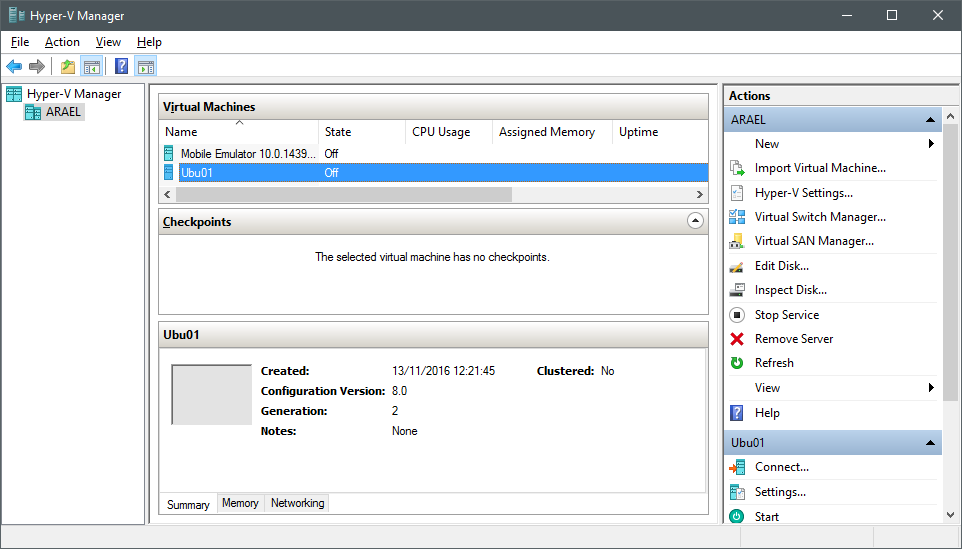
After some operation the wizard will close and we can see the new virtual machine in the list of available ones:
Installation
If we double-click on the virtual machine (or click to the Connect... command in the right panel) we can open the virtual machine:
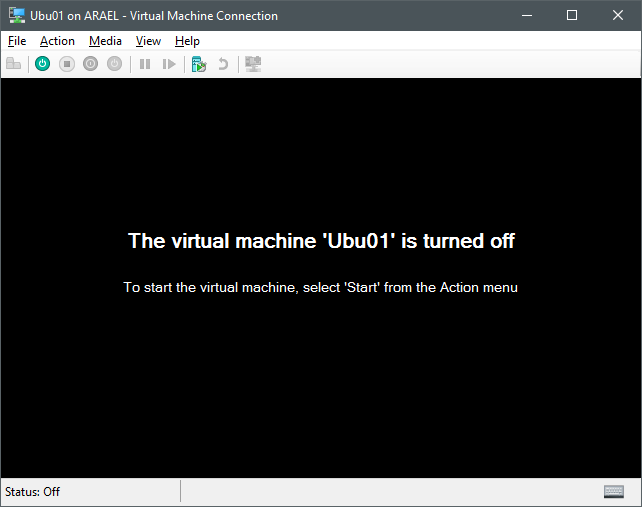
It's tued off, so we need to tu on the virtual machine.
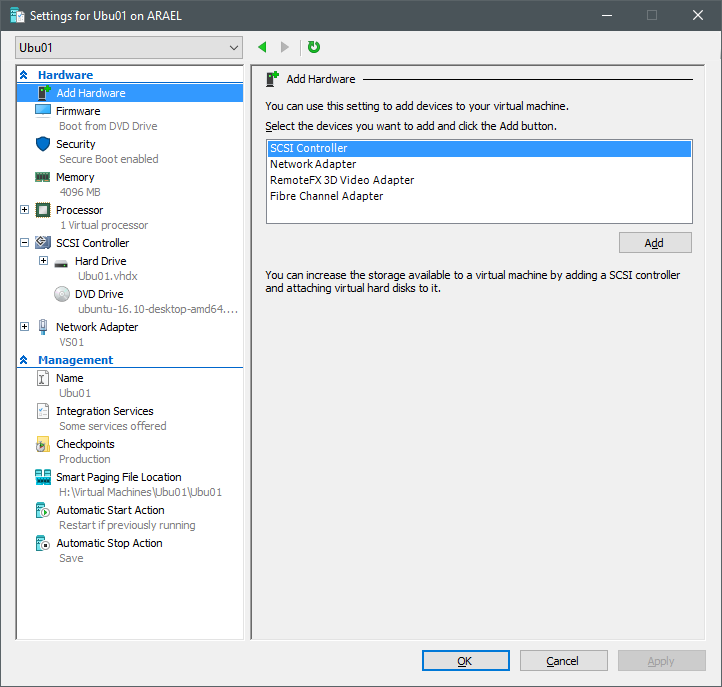
If we start the state machine now, Ubuntu will not starts, because we need to set the UEFI option in order to set some flag. So open settings of the state machine, by right-clicking on it and selecting Settings..., or selecting it in the right panel:
In order to allow Ubuntu to start, we need to disable the Secure Boot, so select the Security section and disable the Enable Secure Boot option:
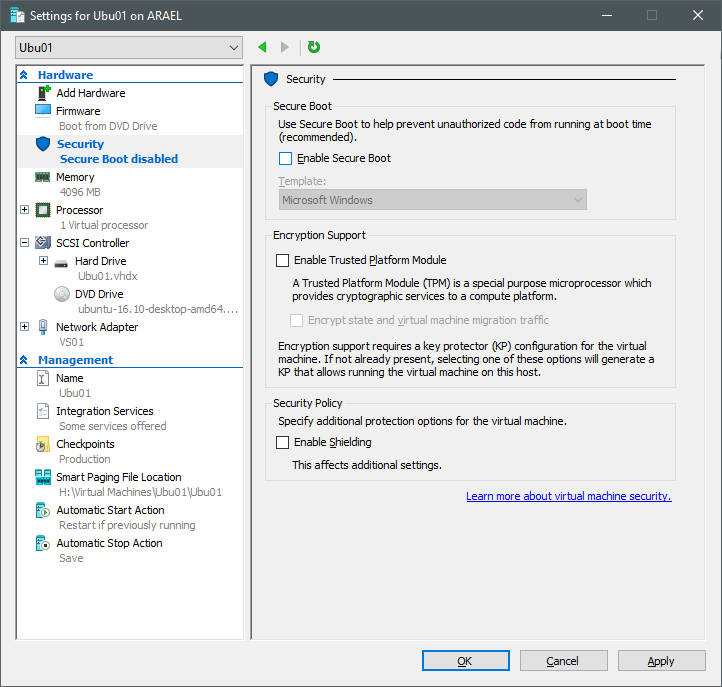
Close the dialog by clicking on Ok. At this point we can start the virtual machine. Click on the start button (the green one representing the power button). The virtual machine will start, and Ubuntu will be loaded from the iso.
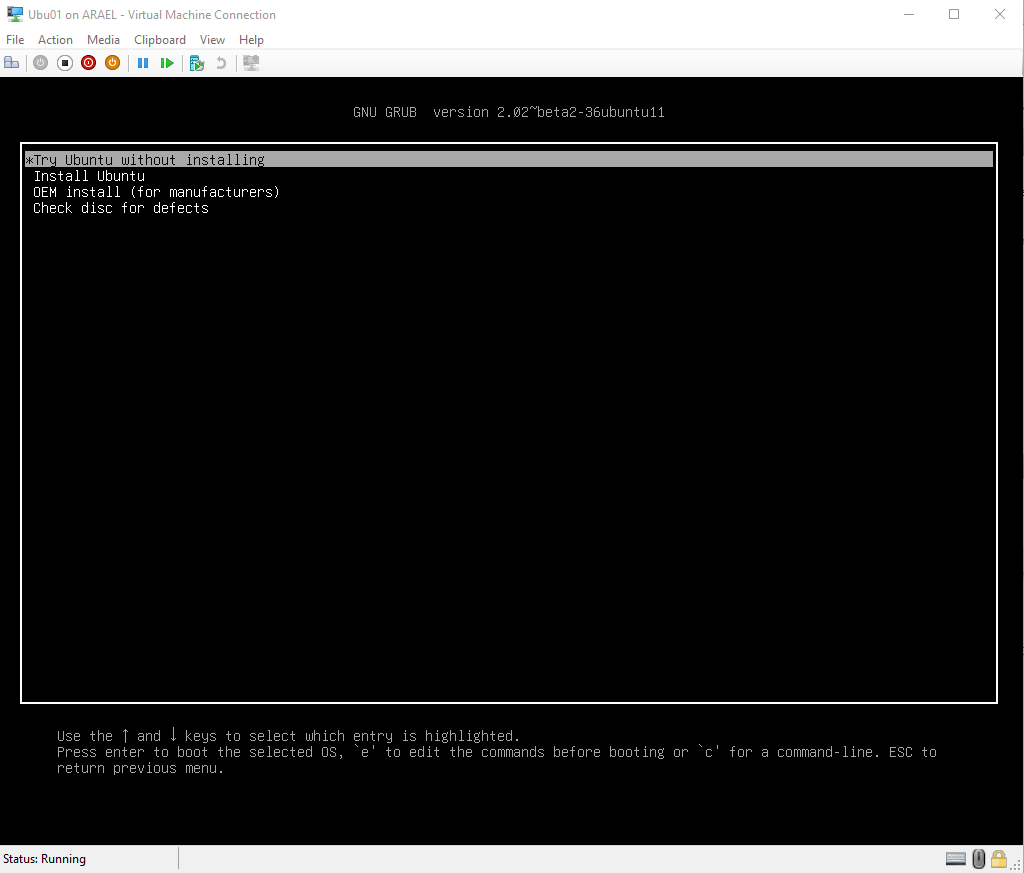
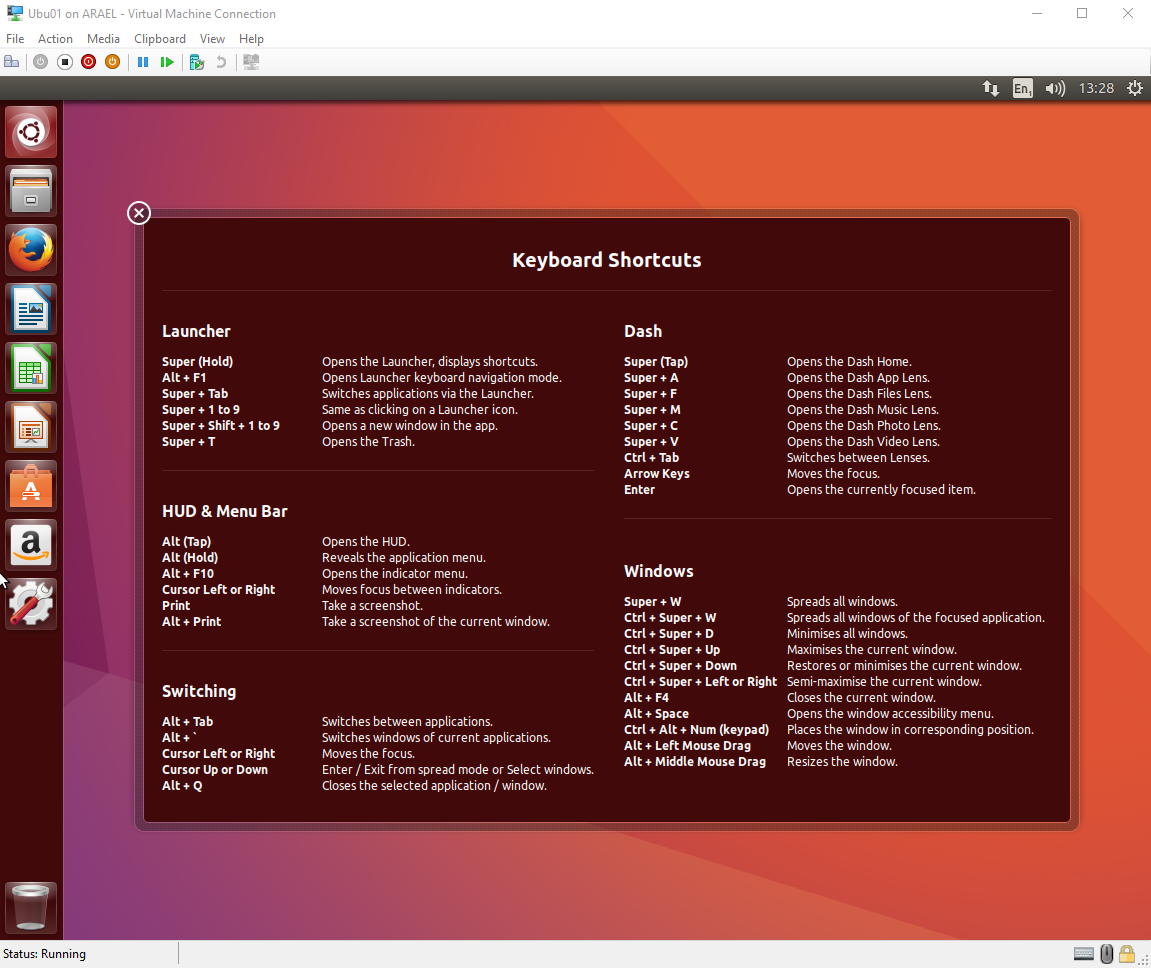
Now it's possible to install Ubuntu. We don't explain here the installation procedure, you can find a lot of documentation around. At the end you'll find the virtual machine with the desktop installed.
Conclusions
In this article we've seen how is possible to install an Ubuntu virtual machine in Hyper-V. This is useful especially because we can perform many experiments without rebooting the systems every time.


Comments
RSS feed for comments to this post