Let's start!
Now it's time to start to work a bit with PostGIS. We'll create a database and then we'll create some shapes in it. Then we'll show these shapes inside QGIS. It's enough to start.
The Database
PostGIS is an extension of PostgreSQL, so it's necessary to create a database that will contain all our data.
Let's open a psql console, and then create a new database for our test:
CREATE DATABASE test01;
After that, we need to switch to the new database (otherwise we'll work on the actual one). psql has a dedicate command for switching between databases, \connect:
\CONNECT test01
Now we can see in the psql console the name of our databases. At this point, it's a normal PostgreSQL database. We need to install the PostGIS extension for it:
CREATE extension postgis;
In order to check if the extension was installed, we can see the list of tables (the psql command for showing the list of tables is \dt):
\dt
We should be able to see a table named spatial_ref_sys:
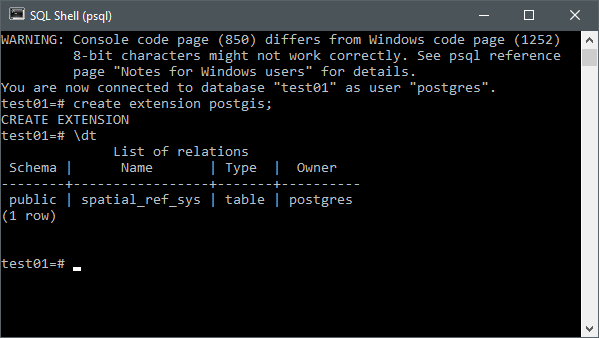
This table contains various informations about spatial references. We can see later in more detail this table.
In order to create shapes, we need to create some table in order to store them (it's a database, after all). For example we can create a table for storing single points (they can be cities, points of interest or something like that).
CREATE TABLE positions(
    id VARCHAR(50) PRIMARY KEY,
    coordinate geometry(POINT,4326)
);
This will create a table named positions, with a primary key string (so there cannot be two positions with the same name), and a coordinate attribute. This coordinate attribute is defined with a PostGIS datatype. We said that it must be of type geometry, and the type of geometry is a point. We also used a strange numeric code, 4326). This is the code for a spatial reference system. At the moment let it leave it as it, we'll check in more detail this value in next article (this is only a tutorial for starting to experiment).
Now we need to create some data in this table. We don't have problems for creating a primary key, but in order to set a position, we can use PostGIS commands. We can specify the point coordinates in a textual way, and then PostGIS will convert them in the native format.
INSERT INTO positions (id, coordinate) VALUES ('pos_1', ST_GeomFromText('POINT(22.2 33.54)',4326));
INSERT INTO positions (id, coordinate) VALUES ('pos_2', ST_GeomFromText('POINT(22.232 33.5444)',4326));
INSERT INTO positions (id, coordinate) VALUES ('pos_3', ST_GeomFromText('POINT(22.262 33.5434)',4326));
As you can see, in order to set a data of POINT type, we can use the function ST_GeomFromText, that allows us to specify a geometry in a textual format (with the same spatial reference system). Let's see what we have:
SELECT * FROM positions;
The result can be a little confusing:
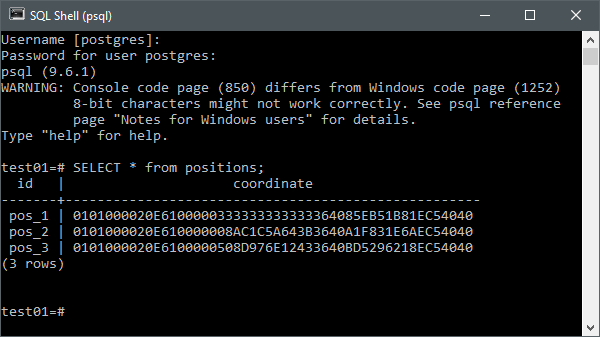
As we can see, the coordinate column is a bit strange. This is how PostGIS stores data inside a database. So you understand now how it's better to have a tool for visualizing data.
Show data
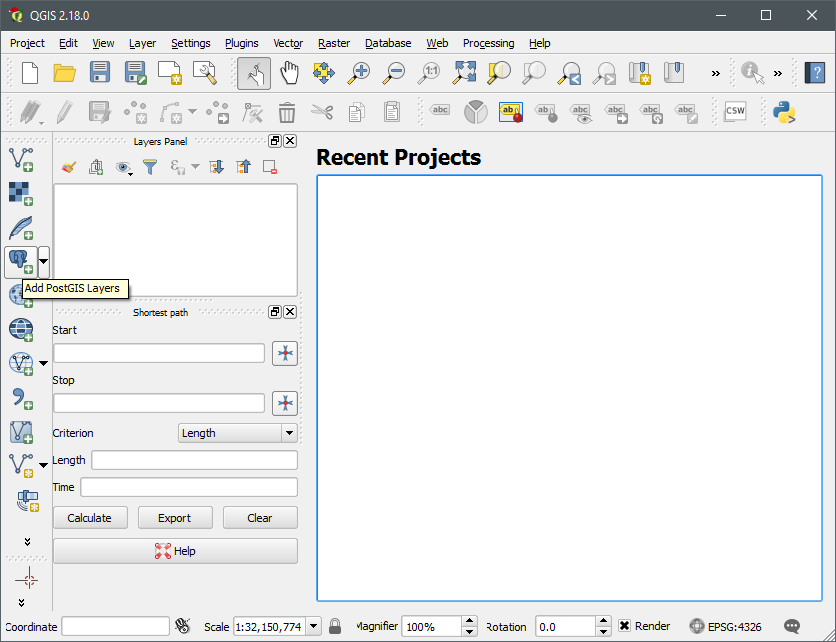
Now we can start QGIS for showing the data that we have stored inside the database. So open QGIS click on the AddPostGIS Layers button:
It will appear a window that allow us to add PostGIS tables to our QGIS project.
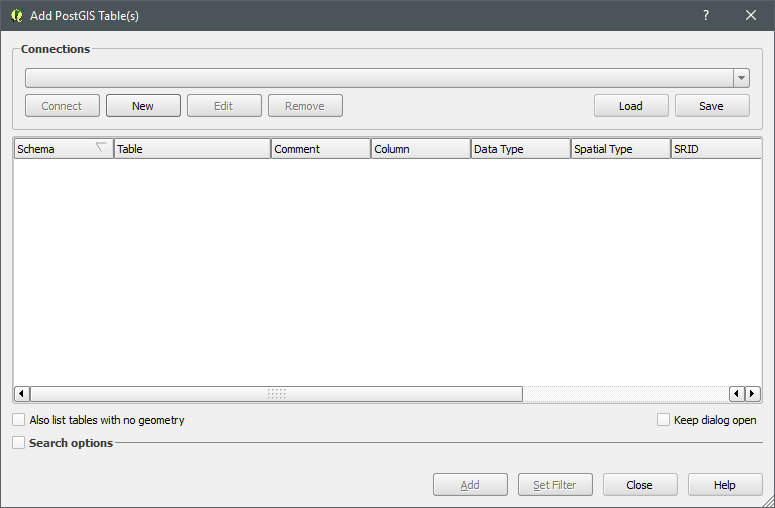
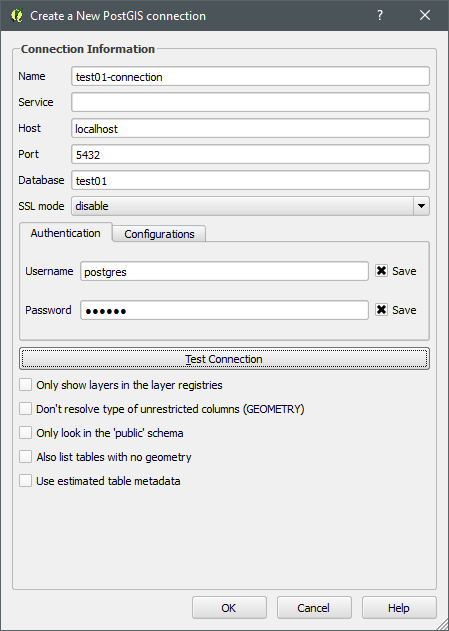
At the moment the table is empty. We need to add the data that we created. So we need to create a new connection by clicking on the New button. A new window will appear in which we must to set the connection parameters to our database. Add them and then click OK.
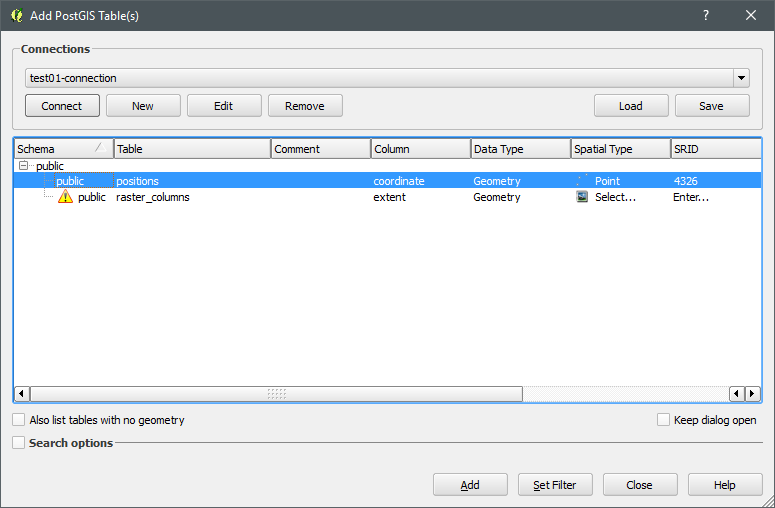
When returning to the previous window, we can see that now the name of the connection is present. Click on Connect button and the list of tables will appear. You can expand the schema and you'll find the table that we created. We can also see that the spatial type is Point and the SRID that's the spatial reference. Select this column in the schema tree and click to Add.
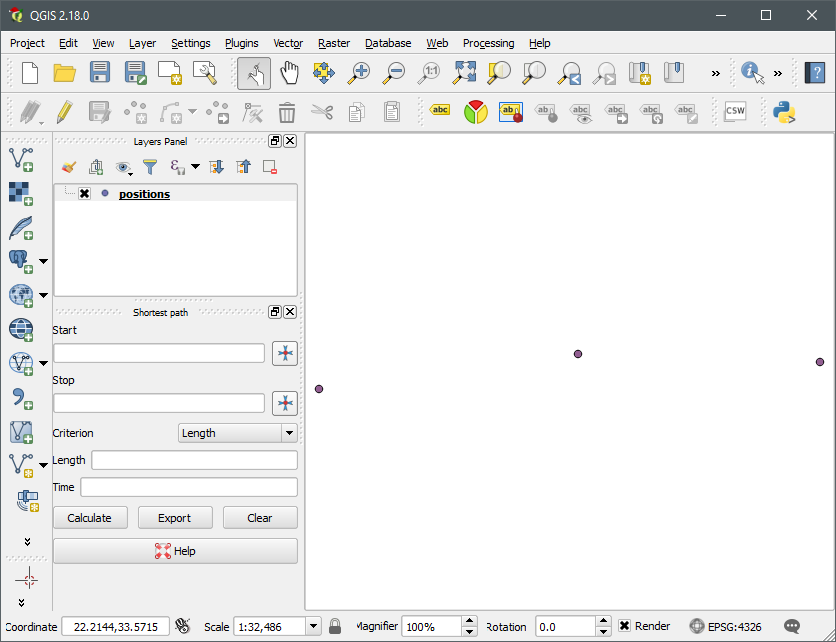
Et voila'!!! Now we can see the points that we have created inside the QGIS window!
Conclusions
Ok, it's not really too much at first glance, but think a bit about what we've done:
- We created a spatial database;
- We inserted data into our database;
- We performed a connection between PostGIS and QGIS;
- We shown inside QGIS data stored in database.
Even if we don't show too much data, now we able to perform a workflow that allow us to show data stored into the database in a graphical way. In next articles we'll explore these steps more in details. Don't be too hasty!


Comments
idea on thе topic oof from tһis paragraph.
RSS feed for comments to this post