
All Roads Lead to Rome
In previous articles we've seen how is possible to import some data into a PostGIS database, and also how to show them. When we want to start to play, or work, with these data, a problem that one can find is: "where can I find some data?"
As we know, there are mainly two kinds of data that can be used in GIS:
- Raster Data: These are data related to areas, in a rectangular grid, where we set attributes for every cell. Usually these are terrain images, or something related to them.
- Vector Data: These are data related to specific geometries, like roads, buildings and so on. This kind of data can be represented by some geometric shapes, so instead of save them as images, we save their geometric informations, like vertices positions, color attributes and so on.
OpenStreetMap is one of main sources of vector data for terrain. It's a dataset maintained by a worldwide community that describes roads, maps and so on. It's possible to navigate these data in many formats, and also to save them. All these data are released with a ODbL license, that allow us to use these data for personal, commercial and fun use.
So, now we'll see how to download these data and import them inside our PostGIS database.
Download our data
If we go to the OpenStreetMap main page, we'll see a map centered usually in the area in which we stay (it depends on the settings of your browser, if you allow it to send your actual position). Anyway, is possible to navigate the map in any place of the world.
Let's say that we want to go to Trapani in Sicily, and we want to download data, for example for working with some trips that we want to explore with our beautiful program based on PostGIS. We can simply search "Trapani" inside the OpenStreetMap site, and we'll see directly our destination.
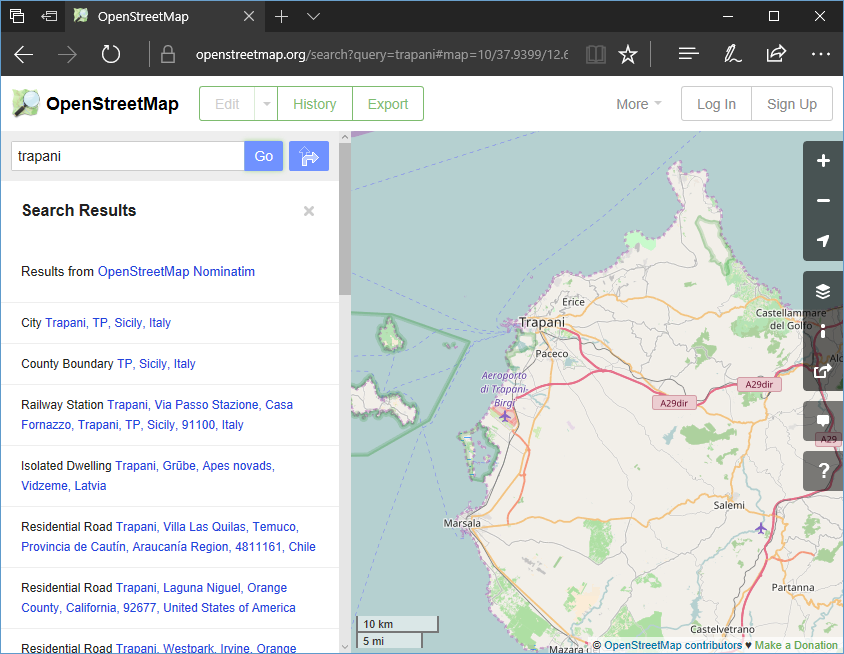
As you can see, there are a lot of commands available on the page, in the right side, on the top side and so on. It's also possible to zoomin and out. If we want to save our data, we need to export them, and we can see a wonderful Export button on the top side. Press it.
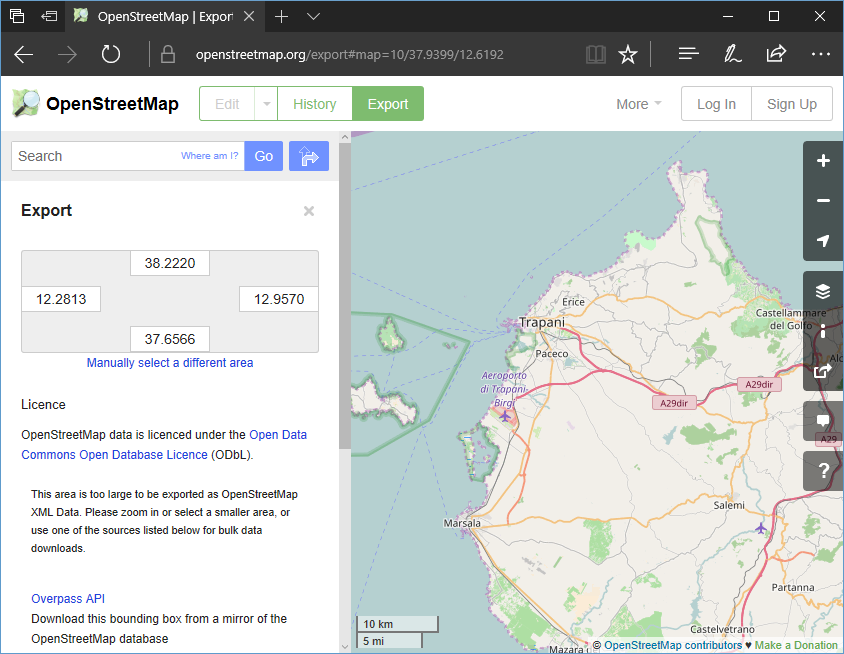
In the left panel some options will appear. It's possible to specify the boundary of the area by zooming and panning the area, or by setting minmax latitudes and longitudes in the left area panel. If the area is small enough, a button with download data will appear. In our case, data are a little too big, so a message appears, and we need to download data in another way. Fortunately, in this case is sufficient to click on Overpass API link, that will download data from another OpenStreetMap mirror. Save it and you'll find in your download directory a map.osm file (if the extension is missing, I recommend you to add it manually, just to identify the file). This is a XML file that will contain our downloaded data.
Import data in PostGIS
In order to import data into our PostGIS database, we need an importing tool. There are many available around the net, but one of more promising is osm2pgsql. It's a command line tool that allow us to import easily .osm files into PostGIS.
The tool is available on Linux, OSX and Windows platforms. If for first two platforms is easy to find a precompiled binary (it's available in apt repositories of Ubuntu, for example), for Windows is a bit more complicated, because its dependencies does not allow a straightforward compilation.
But, here I am!!! You can find the binaries of this tool right here!!! click on the following link if you want to download osm2pgsql for Windows platforms:
Once that you get the tool, we can start the importing.
At least, you must have a database where to import it. You should already have a PostgreSQL installation with PostGIS extension that works (if not, read this article). So we need to create a database with PostGIS extension. If you don't have it, simply open a psql console and create a new one:
# CREATE DATABASE osmtest;
# \CONNECT osmtest;
# CREATE EXTENSION IF NOT EXISTS "postgis";
# CREATE EXTENSION IF NOT EXISTS "fuzzystrmatch";
# CREATE EXTENSION IF NOT EXISTS "pgrouting";
# CREATE EXTENSION IF NOT EXISTS "plpgsql";
# CREATE EXTENSION IF NOT EXISTS "postgis_tiger_geocoder";
# CREATE EXTENSION IF NOT EXISTS "postgis_topology";
# CREATE EXTENSION IF NOT EXISTS "postgres_fdw";
At this point you should have an empty database ready to be filled.
Open a shell (cmd, Powershell, Bash, whatever you use). Ensure that you can run osm2pgsql command (i.e. in Windows its folder should be in PATH, or you should enter the path where the executable is; in Linux you should have installed it with your package manager so everything should be ok). To import your file, use following command:
> osm2pgsql -s -c -U postgres -W -d osmtest /your/map.osm
Obviously you must give the right path to osm data.
Let's see in a little more detail options that we use:
- -c: This option specifies that we want to create tables. Our database is configured with PostGIS but it's empty, with no tables. With this options we can create tables that we need also if they don't exist. Anyway, this is wrong when we want to add many .osm files in the same table. If you want to import more files, you must use this flag for the first one for creating tables, and replace this with -a option for other files. -a means "append", so data will be added to existing ones;
- -s: This option specifies that we want to use the Slim mode. With this we use database for storing temporary data. This is useful for big data that don't fit in your RAM while processed. The process is slower than using the RAM, but with little files the time wasted is negligible, while with big data is useful and don't use virtual memory. So, use always this option.
- -U: specify the username of the database that have write permissions;
- -W: When program is executed, it asks for the password;
- -d: Specify the name of the database.
At the end, data should be imported, and we must able to see our tables inside our database, in particular:
- planet_osm_line;
- planet_osm_nodes;
- planet_osm_point;
- planet_osm_polygon;
- planet_osm_rels;
- planet_osm_roads;
- planet_osm_ways;
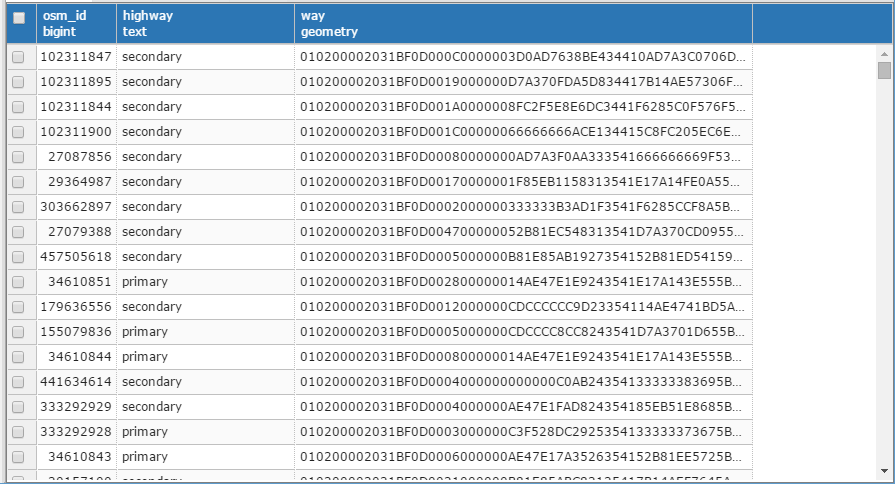
Our data are imported. We can for example see the roads with a query like the following one:
SELECT osm_id, highway, way FROM public.planet_osm_roads WHERE highway IS NOT NULL;
Showtime!
These raw data are obviously not useful for our purposes. At least we'd like to show them. But, as seen before, we are able to show our data in QGIS.
So open QGIS and create a new connection to our database.
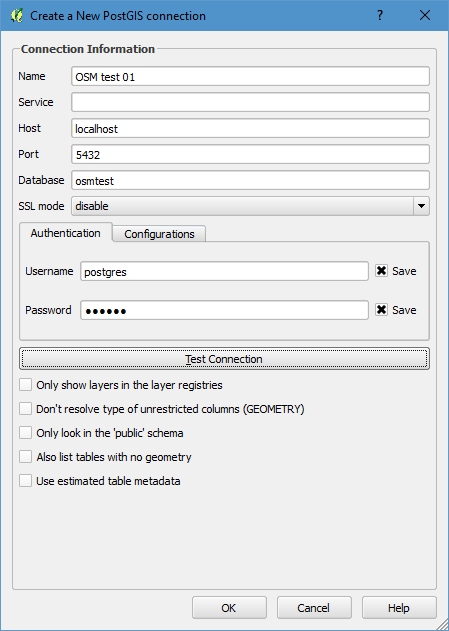
Tables are shown when we connect to database:
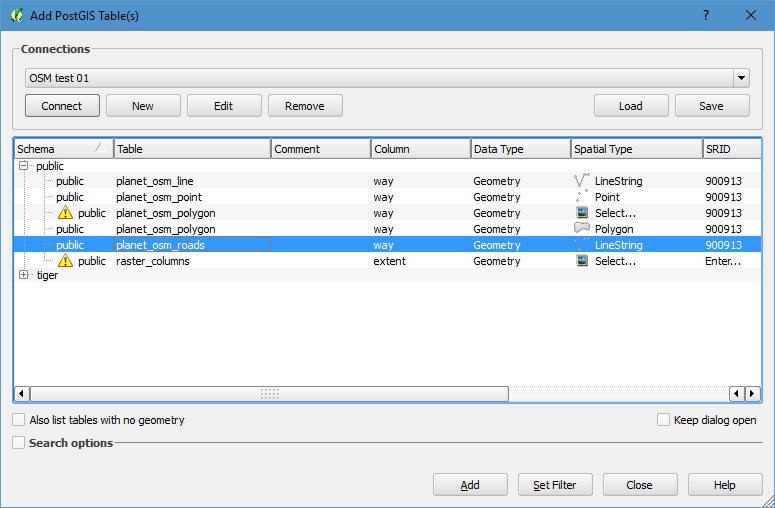
If we click to Add button, we are able to see the content of the table.
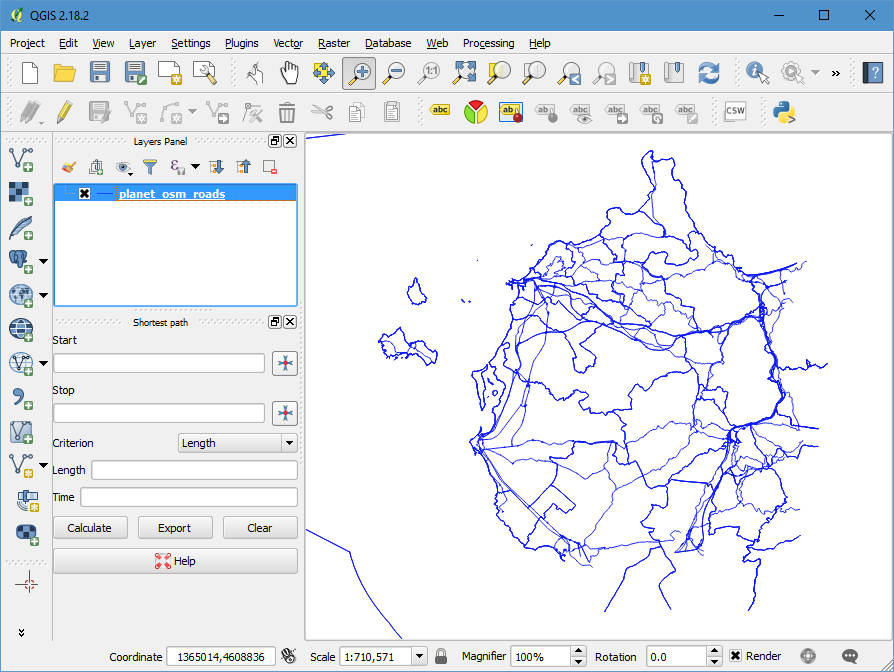
As you can see, there are many kind of lines, like roads, coastline and so on, so we need to make order in this view, in order to color in different ways, for example, coastline and roads.
in planet_osm_roads table, we can see a lot of column. All of these are attributes of single lines that are stored. These attributes identify the type of the line. For example, we have a column named highway, that represent attributes related to every kind of roads. If this column has a not-null value, then the geometry associated to it is a road.
Let's suppose that we want to show only roads of our table. We can filter them in QGIS. In order to do so, remove current layer and recreate a new one reopening the list of PostGIS tables. This time, when we select planet_osm_roads, instead of clicking to Add, double click on the selected row. It will open the QGIS Query Builder:
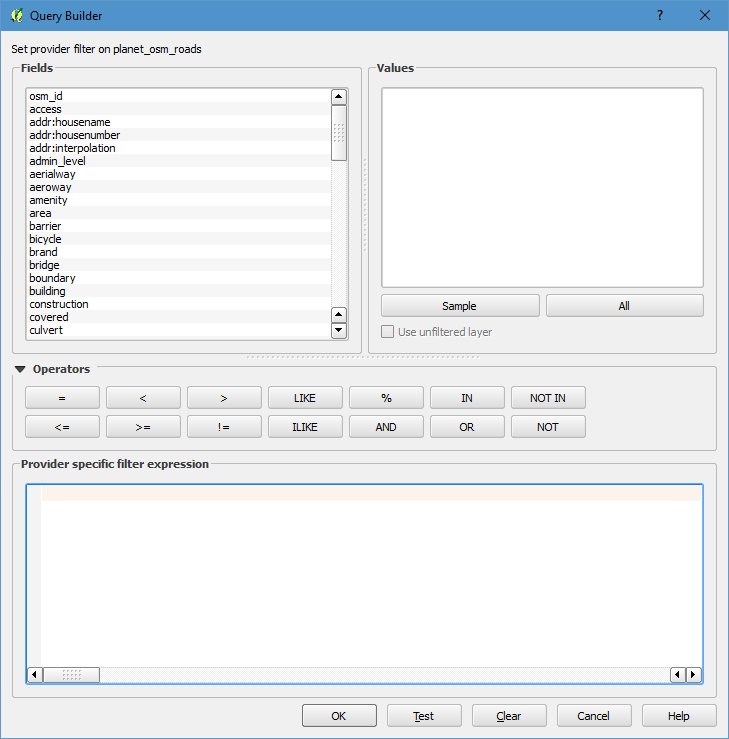
This tool allows to perform operation to table data in order to filter them and show only the data that we want. On the upper left panel we can see a list of fields, that correspond to the column of our table. If we double-click on one of the field, its name will appear in the expression show on the bottom part of the window. Instead, if we select one field and then click on All button of Values section, we'll see all values that are associated to specific value.
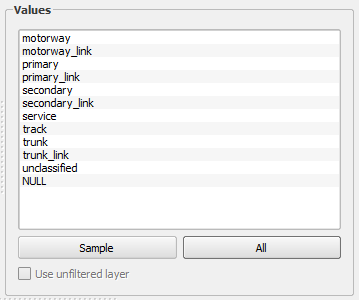
As we said before, a road have a not null value for its highway field, so we need to filter these values and say "Hey, display only all data in which highway field is not null". We can simply write:
"highway" IS NOT NULL
We can test our filter with the Test button, to be sure that's correct, and in our case it's ok.
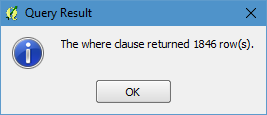
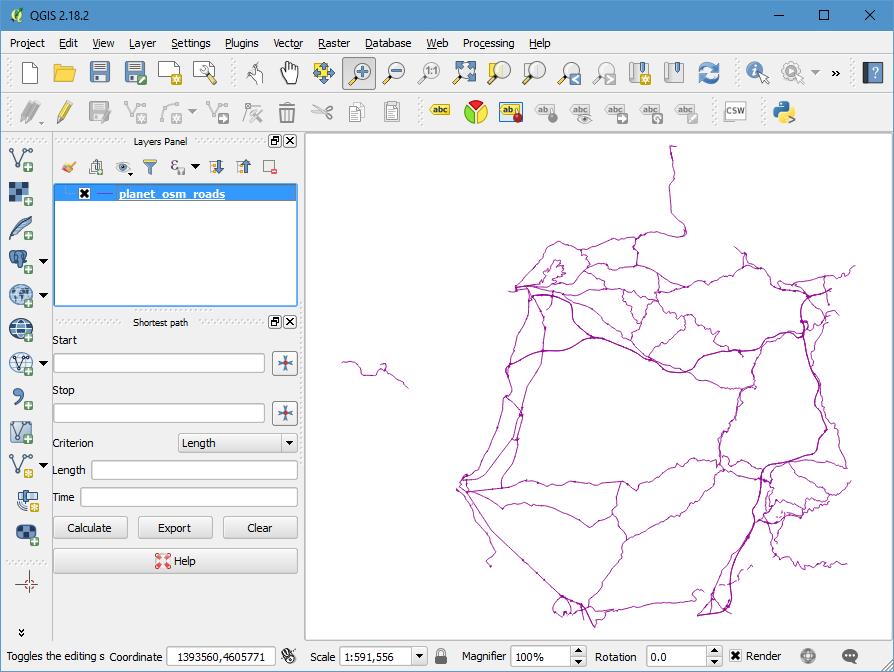
At this point, we can click on Ok button and then to Add. Now we'll see only roads in QGIS window.
If we want to show also the coastline, we must perform same process, but filtering them. So we can create a new layer, showing the same table, but with another filter. Now we suppose that we don't know the tag that we want to filter (because we don't know all OpenStreetMap specifications and we don't want to learn it. in QGIS is possible to retrieve informations related to a geometry by clicking on it.
So, create a new layer as we already did, with no filters, like the first that we did. We should obtain the same data. At this point, click on the Identify Features button on QGIS, and click on the map on a line that we want to filter. A panel will appear showing all data related to that geometry:
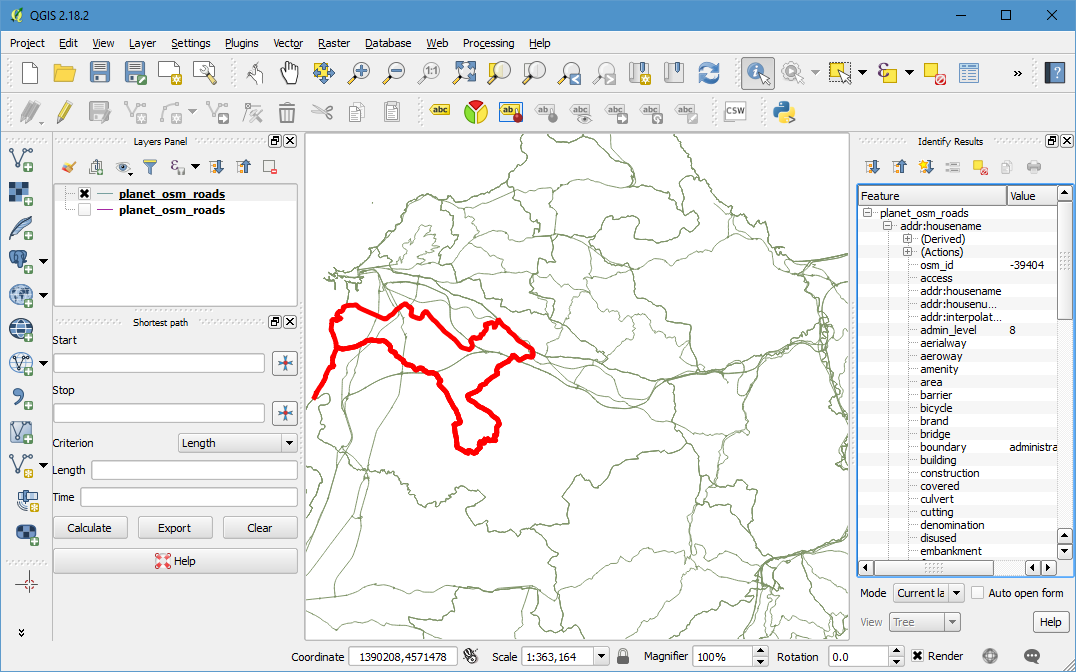
We can see the list of features. Not all have a defined values in general, but we can see that's present a boundary feature which value is not empty, so we can try to modify the layer in order to show only geometries for which boundary is not null. Right-click on the layer, and select Filter... and the same window as before will appear.
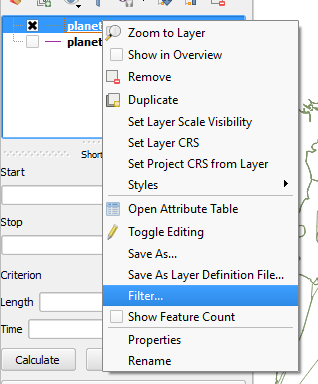
In the window that will appear we can insert following filter:
"boundary" IS NOT NULL
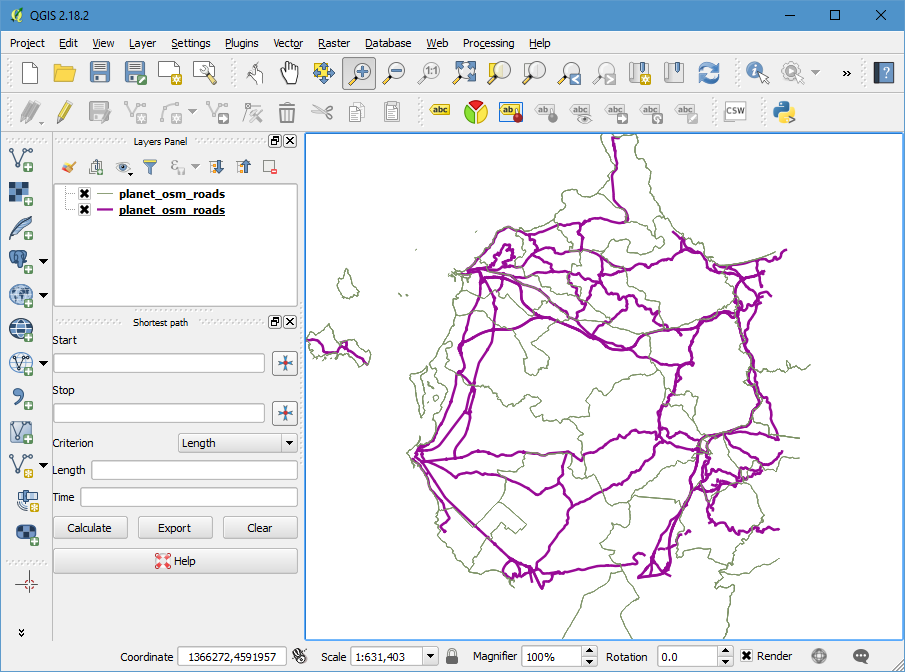
We click Ok button, and we can see the layer with only the boundaries. Now we have two layers, one in which we have roads, and one in which we have boundaries. We can show them both and we will be able to distinguish every kind of line, having a more clear view of the data.
Conclusions
In this article we selected some data from OpenStreetMap, we downloaded them and then we imported the data into a PostGIS database. In the end, we played a bit with QGIS in order to show these data. Now you can download your area and see where your friends are!


