Draw something!
We've seen in previous article how is possible to connect a PostGIS database to QGIS, and how is possible to create points and show them inside it. Now we'll go a bit ahead, and we'll see how to create more complex shapes inside PostGIS.
WKT, WKB, EWKT, EWKB
Ok the section title is a bit strange. What are these meaningless words?
These are the names of the file format that can be used for importing shapes inside PostGIS. The theory is simple; PostGIS, as database, works with queries, so in order to create shapes we need to create a query to do it. PostGIS has built-int SQL functions that allows to create shapes from a textual (or binary) description. The format that describe a shape this way can be one of following ones:
- WKT - Well-Known Text: This is a textual format that allows to describes shapes with human-readable text files. For example, if we want to create a point, we can write
POINT(0 0); - EWKT - Extended Well-Known Text: This is a superset of the previous format. It allows to create all the shapes that are possible to set with the WKT format, and adds other shape types (like 3D shapes);
- WKB - Well-Known Binary: This is a binary format that allows to create the same shapes that are possible to create with the WKT format;
- EWKB - Extended Well-Known Binary: I suppose that you can imagine what's this file format, or not?
WKT (and WKB) allows to create following shapes:
- Point: This is a single point, defined by its coordinate system. A point can be defined with the
POINTkeyword, i.e.POINT (3 4); - Line: This is a line defined by a list of straight segments. A line must be defined with the
LINESTRINGkeyword, i.e.LINESTRING (1 3, 4 5, 2 2); - Polygon: This is a polygon. It's possible to define a normal polygon or a polygon with an hole inside. A polygon must be defined with the
POLYGONkeyword, i.e.POLYGON ((2 2, 4 3, 3 3)). Please note the double round parenthesis. If we want to create a polygon with a hole we should writePOLYGON (( -5 -5, -5 6, 5 6, 4 -6)(-1 -1, 0 0, 0 2)); - MultiPoint: This is a collection of points, allowing to create many of them at once, instead that one at time. The keyword for defining a multipont is
MULTIPOINT, i.e.MULTIPOINT (1 1, 4 3, 6 6); - MultiPolygon: This is a collection of polygons, using the same logic of a multipoint. The keyword is, obviously,
MULTIPOLYGON. Please note that also in this case the double round parenthesis should be used for consistency, even if no hole is defined for polygon, i.e.MULTIPOLYGON(((0 0,4 0,4 4,0 4,0 0),(1 1,2 1,2 2,1 2,1 1)), ((-1 -1,-1 -2,-2 -2,-2 -1,-1 -1))); - GeometryCollection: This is a collection of shapes. We can see it as a vector of geometries (that can be also nested if we use geometry collection of geometry collections). The keyword is
GEOMETRYCOLLECTION, i.e.GEOMETRYCOLLECTION(POINT(2 3),LINESTRING((2 3,3 4)), LINESTRING (1 3, 4 5, 2 2)).
Of course there are many other commands. For a more detailed description you can check the specification of the file format, that's a standard, but at the moment we can work with these basic shapes.
Let's Start
In order to start to work, we need to create a new database for our purposes. So open a psql console and write following commands:
CREATE DATABASE shapes01;
CREATE EXTENSION postgis;
These are the same commands that we already used. Now we need to create tables. When we create a table, we must specify the type on the column. We can set only a specific type for a column. If we say that one column contains points, it cannot contains also lines, and so on. So we'll create three tables: one for points, one for lines and one for polygons. These are the SQL commands for creating these tables:
CREATE TABLE points (
    id INTEGER PRIMARY KEY,
    pt geometry(POINT,4326)
);
CREATE TABLE LINES (
    id INTEGER PRIMARY KEY,
    ln geometry(LINESTRING,4326)
);
CREATE TABLE polygons (
    id INTEGER PRIMARY KEY,
    pl geometry(POLYGON,4326)
);
Now we can insert some data. Let's insert some points
Points can be inserted in two ways. We can use the WKT format, specifying a string in the query and using the function ST_GeomFromText for parsing it and creating the point, like these ones:
INSERT INTO points (id, pt) VALUES (1, ST_GeomFromText('POINT(10.40015 44.79464)',4326));
INSERT INTO points (id, pt) VALUES (2, ST_GeomFromText('POINT(10.40056 44.79484)',4326));
INSERT INTO points (id, pt) VALUES (3, ST_GeomFromText('POINT(10.40163 44.79486)',4326));
INSERT INTO points (id, pt) VALUES (4, ST_GeomFromText('POINT(10.40137 44.79366)',4326));
Another way is to specify directly the latitude and the longitude without passing to a WKT file format. In this case we can use the ST_MakePoint function:
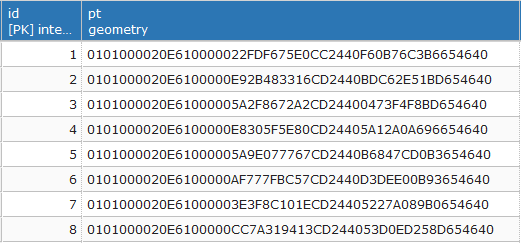
INSERT INTO points (id, pt) VALUES (5, ST_SetSRID(ST_MakePoint(10.40118, 44.79455), 4326));
INSERT INTO points (id, pt) VALUES (6, ST_SetSRID(ST_MakePoint(10.40106, 44.79355), 4326));
INSERT INTO points (id, pt) VALUES (7, ST_SetSRID(ST_MakePoint(10.40062, 44.79445), 4326));
INSERT INTO points (id, pt) VALUES (8, ST_SetSRID(ST_MakePoint(10.40054, 44.79337), 4326));
Please note in this case that we at first create the point, and then we set the corresponding SRID. It's still to early to talk about SRID. At the moment you must know that it identifies the mathematical representation of the world.
Another important thing to know is that in order to set a geographic point, the first coordinate is the longitude, like the second one is the latitude. Remember this well, because we're used to write points in lat lon format, while we use the reverse order.

Now it's time to insert lines.
There are many way to create lines, but the simplest way to insert them by hand is to use again the ST_SetGeomFromText function. If we want to insert a line with many points, we can write something like:
INSERT INTO LINES (id, ln) VALUES (1, ST_GeomFromText('LINESTRING(10.39590 44.80076, 10.41021 44.79776, 10.40955 44.79597, 10.40886 44.79419, 10.40873 44.79347)',4326));
INSERT INTO LINES (id, ln) VALUES (2, ST_GeomFromText('LINESTRING(10.40873 44.79347, 10.40845 44.79277, 10.40807 44.79193, 10.40753 44.79148, 10.40538 44.79084, 10.40392 44.79053)',4326));
INSERT INTO LINES (id, ln) VALUES (3, ST_GeomFromText('LINESTRING(10.40392 44.79053, 10.39770 44.78959, 10.40008 44.79546, 10.39395 44.79569, 10.39373 44.79688)',4326));
There's another way to insert points. This can be a little more complicated if we insert them by hand, but is extremely useful if we insert data using queries, for example taking points from a query and using them for creating lines. We have to use the ST_MakeLine function, that allows to create lines using a series of PostGIS points, like we created before:
INSERT INTO LINES (id, ln) VALUES (4, ST_MakeLine(ARRAY[ST_SetSRID(ST_MakePoint(10.39373, 44.79688), 4326), ST_SetSRID(ST_MakePoint(10.39384, 44.79799), 4326), ST_SetSRID(ST_MakePoint(10.39455, 44.79944), 4326), ST_SetSRID(ST_MakePoint(10.39590, 44.80076), 4326)]));
At the end, we can insert polygons. Even in this case we can create polygons by specifying the WKT string, or by setting manually points. In the first case we have:
INSERT INTO polygons (id, pl) VALUES (1, ST_GeomFromText('POLYGON((10.40163 44.79945, 10.40369 44.79904, 10.40289 44.79726, 10.40412 44.79697, 10.40328 44.79522, 10.40013 44.79589, 10.40163 44.79945))',4326));
INSERT INTO polygons (id, pl) VALUES (2, ST_GeomFromText('POLYGON((10.40643 44.79722, 10.40976 44.79661, 10.40937 44.79565, 10.40843 44.79572, 10.40789 44.79432, 10.40536 44.79469, 10.40643 44.79722))',4326));
While in the second case we can create a polygon from a line:
INSERT INTO polygons (id, pl) VALUES (
    3,
    ST_MakePolygon(
        ST_MakeLine(ARRAY[
            ST_SetSRID(ST_MakePoint(10.40358, 44.79487), 4326),
            ST_SetSRID(ST_MakePoint(10.40545, 44.79455), 4326),
            ST_SetSRID(ST_MakePoint(10.40480, 44.79259), 4326),
            ST_SetSRID(ST_MakePoint(10.40298, 44.79326), 4326),
            ST_SetSRID(ST_MakePoint(10.40358, 44.79487), 4326)
        ])
    )
);
Please note that for a polygon, the line must be closed, so the last point must be equal to the first one.
What we did?
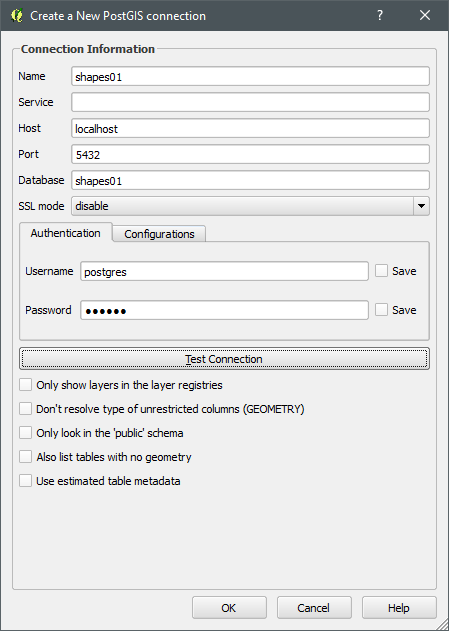
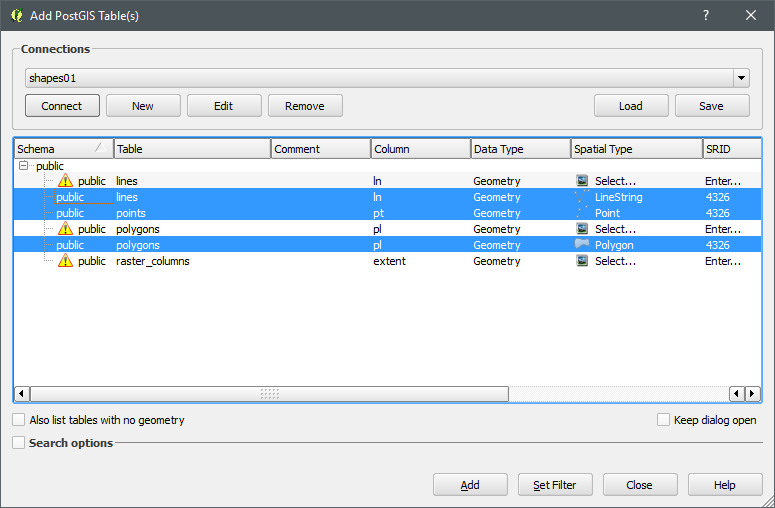
Now we can connect to QGIS in order to see what we've done with these queries. So we can connect QGIS to this database, like we did in the previous article, and we can see the list of tables with figures:

Now we can select data that we inserted:

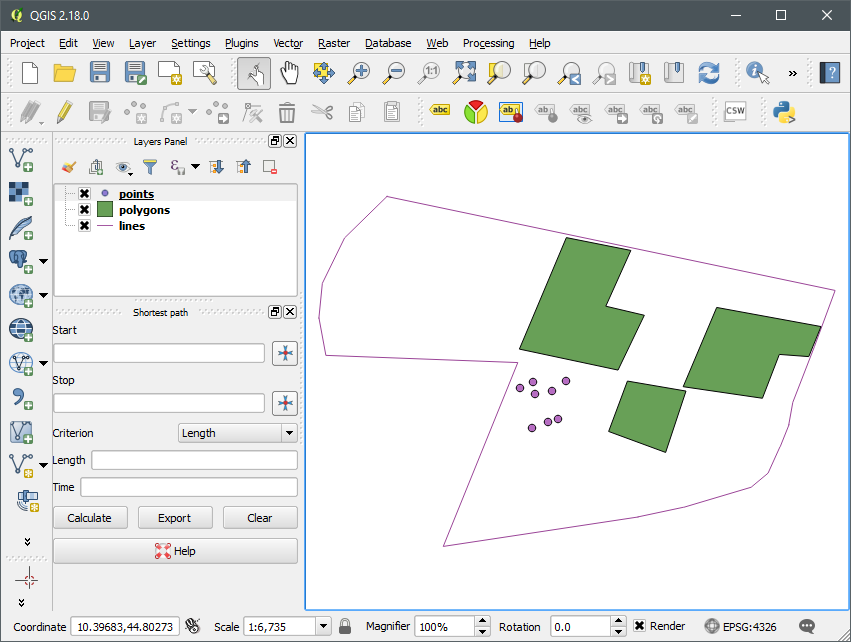
Et voila'! Now we can see the geometries that we created (a little field in Italy):

Conclusions
In this article we've seen that we are able to create different type of shapes inside our PostGIS database. Naturally there are a lot of possibilities and the list of commands for creating geometries is way longer than this one (it's only an introduction).
If you want to study a bit more you can see following links:
- http://www.postgis.net/docs/reference.html#Geometry_Constructors: List of PostGIS commands for creating geometries;
- http://docs.opengeospatial.org/is/12-063r5/12-063r5.html: WKT specifications.
That's all at the moment. See you in next article!


