Sending data
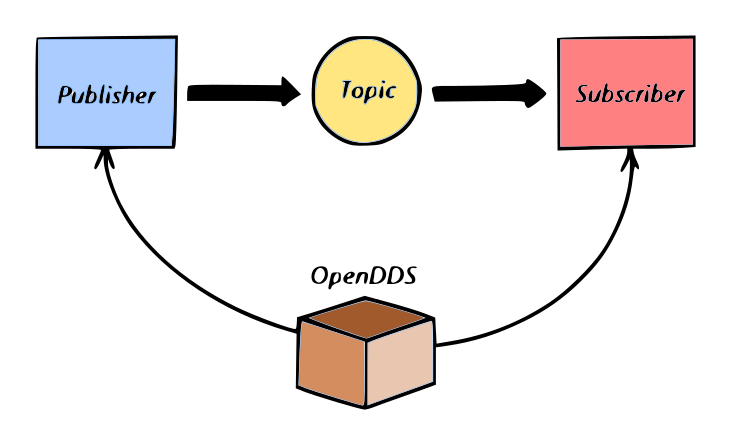
In this first example we'll see how to send a single data, from a publisher to a subscriber.
We'll create a topic, that's a structure that will be exchanged through DDS. Then the publisher will send periodically this topic, and it will be received by the subscriber, that will receive it.
Project
In order to maintain the code as much cross-platform as possible, we'll use CMake for our projects, so it's possible to build them almost everywhere. We have a a complete series of articles about CMake. The project can be downloaded from our GitHub page. Simply go to the folder where you want to save our project and clone it:
> git clone https://github.com/wteamit/opendds-sample-01.git
The project has two projects: a subscriber and a publisher. In addition to this, some code is shared between them, representing the message (topic) that must be exchanged.
The topic
In order to exchange a message, we need a topic. A topic is a structure (usually defined in a .idl file) with many attributes. The .idl file is then compiled by OpenDDS and it creates .h and .cpp support files. When a program includes these files it can send and receive the topic.
This is the topic that we want to create:
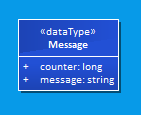
It contains two fields:
- a message string;
- a integer counter.
This is the Topics.idl file of the project:
module TopicSample {

#pragma DCPS_DATA_TYPE "TopicSample::Message"

struct Message {
  string m;
  long counter;
};

};
We can see that topics must be inserted in modules (something like namespaces). We create the structure in a c-like format, and then we prepend a #pragma for specifying some topic attribute. We'll see it later in more detail. At the moment we have this.
Now we can create the source files from this idl, by executing following commands:
> opendds_idl.exe Topics.idl -o .
> tao_idl.exe Topics.idl -o .
> tao_idl.exe -Ipath\to\OpenDDS TopicsTypeSupport.idl -o .
In order to use these commands, the environment variables must be set with the setenv.cmd command inside the OpenDDS folder. Maybe it's also necessary to set the paths of executables into %PATH%. Or you can use the complete path to the executable if you want.
Anyway, these commands will create the c++ files related to this topics, that are the following ones:
- TopicsC.cpp
- TopicsC.h
- TopicsC.inl
- TopicsS.cpp
- TopicsS.h
- TopicsTypeSupport.idl
- TopicsTypeSupportC.cpp
- TopicsTypeSupportC.h
- TopicsTypeSupportC.inl
- TopicsTypeSupportImpl.cpp
- TopicsTypeSupportImpl.h
- TopicsTypeSupportS.cpp
- TopicsTypeSupportS.h
These are a lot of files!!! Anyway there must be included in our projects, that are the publisher and the subscriber ones. We'll see in next articles the exact meaning of these files and how is possible to create them from an IDL file. At the moment we know that we have these files and we need to build them in our projects. For this project instead of creating a separate library, we'll use the source files directly in the subscriber and in the publisher.
Publisher
Now we'll how to send data through this topic.
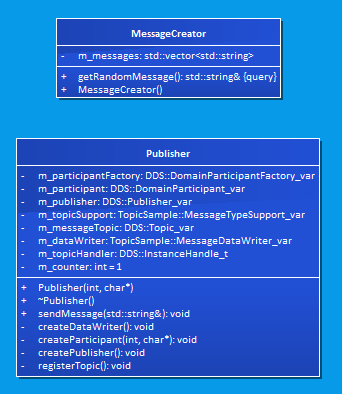
The publisher project is a program that sends a random message in DDS, using the topic. It connects to DDS, and then every second send a message.
We have two main classes, in order maintain the code organized:
- MessageCreator: This is the class that creates the random message;
- Publisher: This is the class that contain the OpenDDS publisher.
The program first create the publisher, and initialize it by creating some OpenDDS classes. Then, in a loop, it creates every second a message by using the MessageCreator and then it send the message using the Publisher.
Subscriber
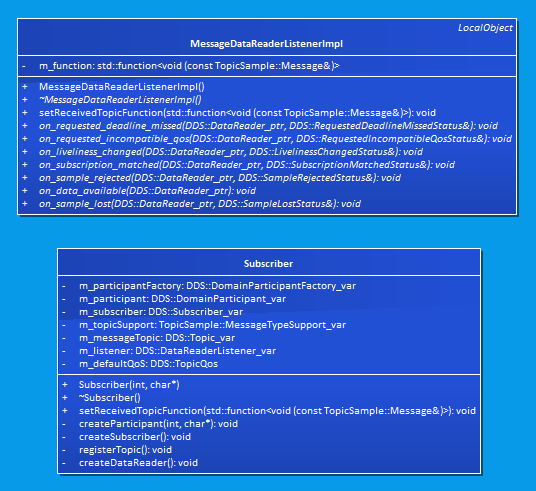
The subscriber is the dual of the publisher. It has two main classes, one for creating the OpenDDS subscriber, and another one, named MessageDataReaderListenerImpl, that is used by the subriber, in order to know what to do with arriving topics. At the moment, we pass to this class a function that prints the topic when it's received.
Build on Windows
The project is based on CMake, so it's simple to configure. Open a console, create a new folder (I personally never build a CMake project inside its own folder), and run following command:
> cmake -DDDS_ROOT_DIR=path\to\your\dds\installation\ \path\to\this\sample
This allows to configure the project. If you want to use a specific compiler (and changing the architecture, for example), you need to add the -G CMake option, like this:
> cmake -G"Visual Studio 14 2015 Win64" -DDDS_ROOT_DIR=path\to\your\dds\installation\ \path\to\this\sample
When everything is ok, you can build the project with following command:
> cmake --build .
At this point in your build folder you can see a bin\ one, enter it and you can find your executables.
Build on Linux
The steps for building it on Linux are the same, with the only difference to use setenv.sh instead of setenv.cmd.
Run it!
In order to run the sample, we need three consoles.
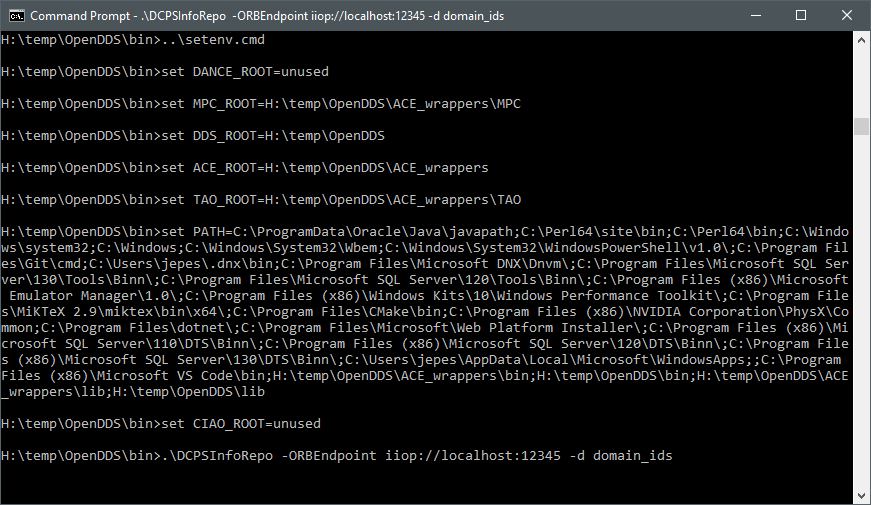
On the first console, we must start the InfoRepo. Go to the OpenDDS binary dir and, after running the setenv script, start the Inforepo with following commands:
> ..\setenv.cmd
> .\DCPSInfoRepo -ORBEndpoint iiop://localhost:12345 -d domain_ids
At this point the server will starts. It will do anything particular in the console...
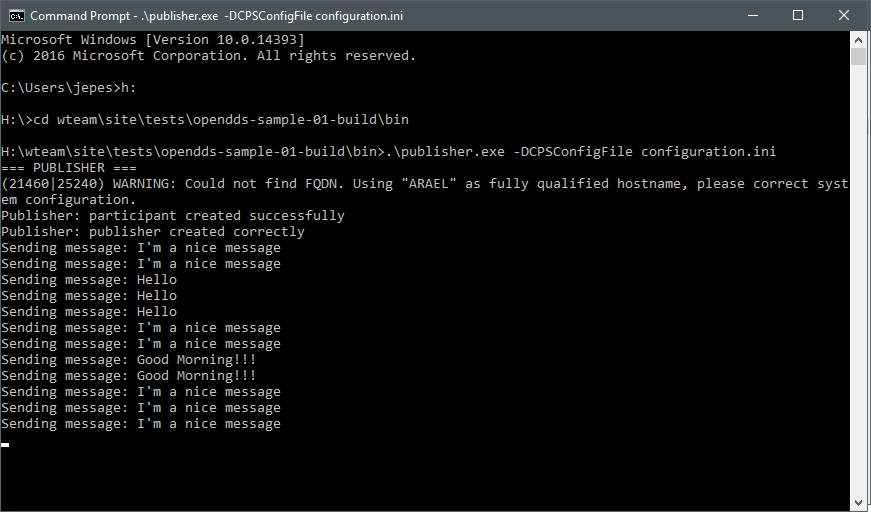
After it, open another console, and start the publisher. Go to the folder where we built the project, enter the bin\ folder, and run following command:
> .\publisher -DCPSConfigFile configuration.ini
As you can see, the publisher will start and, after some second, it will start to print messages to the console, That are the messages that are sent through DDS.
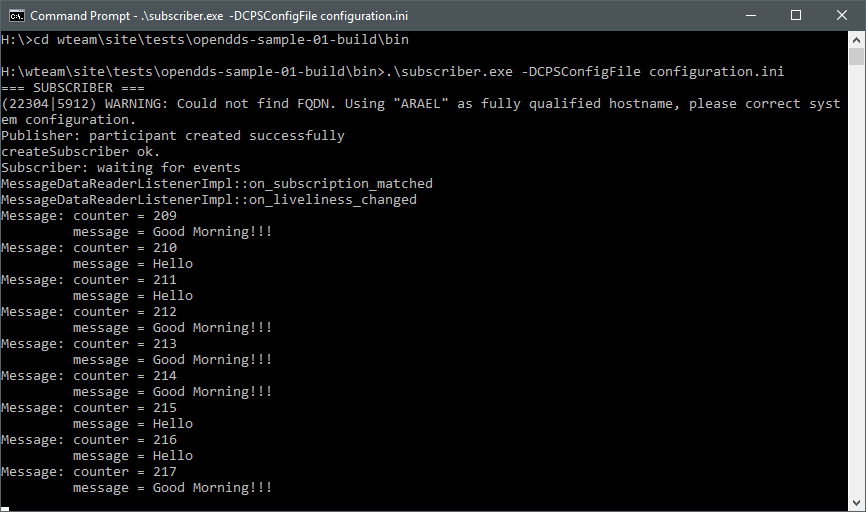
At the end, open the third console. Go to the same folder in which the publisher is, and start the subscriber with the following command:
.\subscriber -DCPSConfigFile configuration.ini
The subscriber will start, and after the initialization the console will display the messages received from DDS, that are the same that are sent from the publisher. So we have a working OpenDDS connection. Congratulations!
Conclusions
In this article we've shown a little example of a working OpenDDS communication. The project is only a sample for people that want to see it working. We'll explain in more details all the features of OpenDDS shown in this article, and much more. Stay tuned!
Articles of the OpenDDS Series:
